If you’ve been following us since the beginning, it will come as no surprise to hear that we are huge fans of gallery walls. Our love of affordable artwork clustered together in varying shapes and sizes, has been with us from our early days, drawing inspiration from the Scandinavian interiors we admired so much on blogs and Instagram. But while we can all agree that a gallery wall looks amazing, the idea of hanging one in your own home can be a little daunting. If you’re stuck on where to begin, our clever norsuHOME styling team have broken down the process to to perfect hanging your own gallery in the easiest way possible. Here’s how to prepare yourself for those perfect walls in no time!


Top tips for perfecting a gallery wall
STEP ONE: GATHER YOUR PERFECT MIX OF PRINTS
Ensure there’s a consistent theme throughout all your prints - this could be a style, colour, interest or a feeling.
Choose at least three prints for your gallery to get that clustered look.
Don’t be restricted to just prints. Adding an object, can also add interest and depth. Check out when we did this recently in Lachy’s room where we mounted a skateboard deck to the wall - which became the inspiration for the theme and colour palette for the entire room.
Don’t be afraid to mix up your frame colours. Using several different coloured frames adds interest and ensures you can perfectly match your frame with your print.
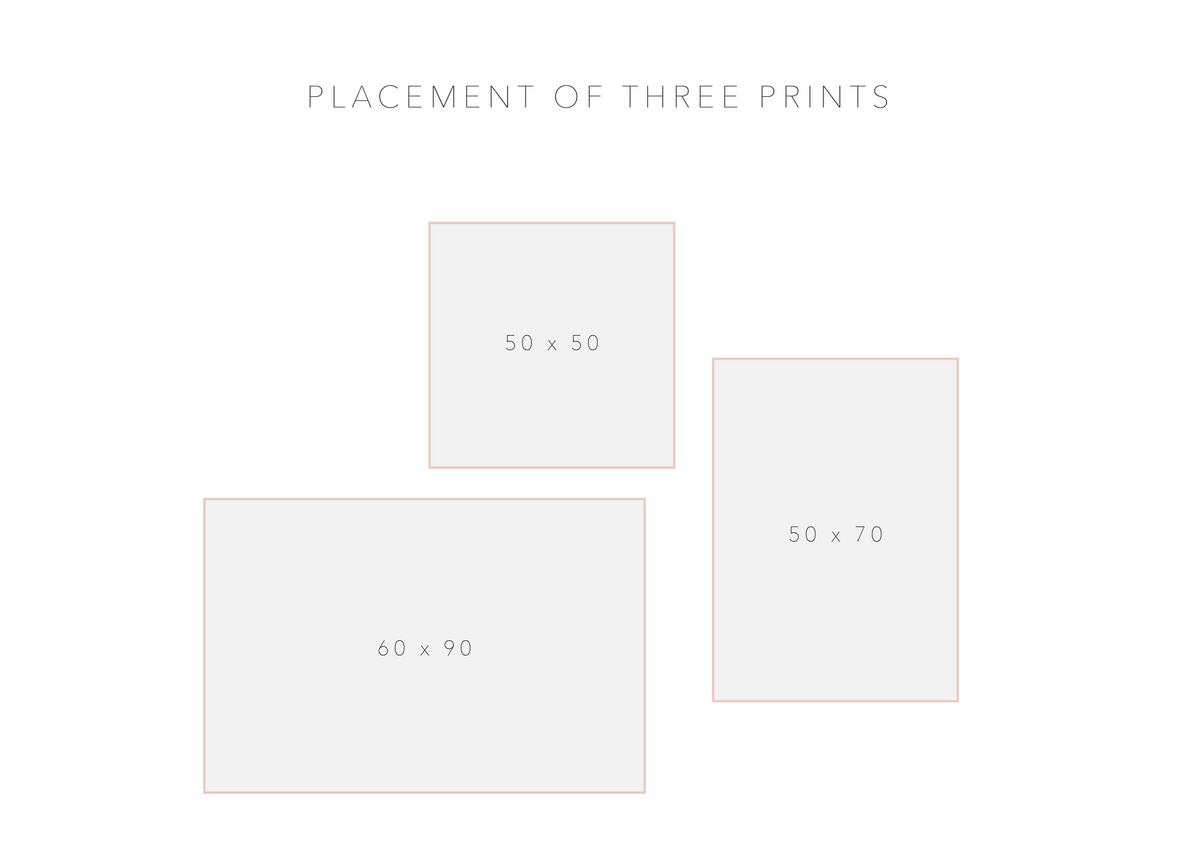
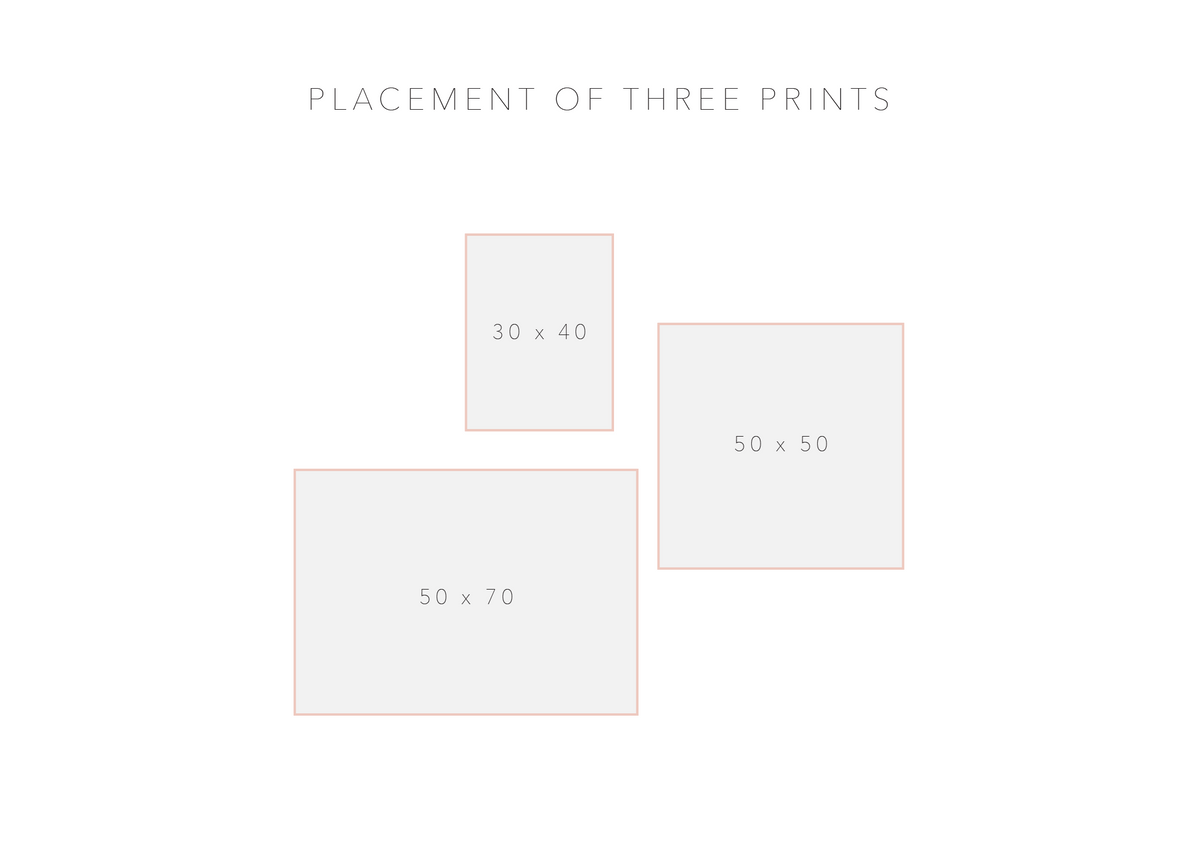
Mix sizes, horizontals and verticals, heights and widths. There is no wrong or right it's all about how they fit together. Here are some of our favourite gallery wall layouts to make it super simple.


STEP TWO: PLAN, PLAN, PLAN
Before you even touch a drill or hammer, make sure you carefully plan where you’re going to place all your pieces by laying them on the floor. This is your opportunity to look at cohesion and spacing so don’t be scared to change things up until you get it right.
Measure out the amount of space you want the gallery to fill on your wall them mark out the same area on your floor with painters tape.
Start with the hero print first - this will be the key piece and will be the anchor for your gallery wall, then begin placing all other pieces around it. Try to have consistent spacing between all pieces. We recommend approx 8cm gap between each frame. But let’s face it, nobody is perfect so don’t fret if your gaps aren’t. Different spaces will give your gallery wall character!
Snap a photo of your layout once you have it just right, so you can refer back to it during the hanging process.

STEP THREE: IT'S TIME TO GET HANGING!
Firstly decide on the centre height of your gallery wall. Standard height is approx 1.5m from the floor, which also happens to be the average human eye-height, so this is a great start. For the perfectionists amongst us you may want to start measuring, or you can just eyeball it for those impatient peeps (guilty!). For perfectly straight art, reach for the spirit level and measuring tape.
Decide how you are going to fix your art to your wall - If you’re in a rental, or afraid of permanent fixings, we are huge fans of the Command 3M strips - but only for lightweight art that’s not hung behind glass (we’ve heard way too many horror stories of damaged pieces that have fallen because they’re too heavy to hold with the strips).
If you’re in need of something more permanent, you’ll need a fixing that will last (either a picture hanging hook or screw depending on the material of your wall). Check out our fool-proof hanging steps below if this is the path you’re heading down.
Start by hanging with your hero piece first (which is usually positioned amongst the centre of your gallery), then start clustering around this piece, and any existing furniture that may be placed against the wall.Stand back and admire your work at each step, tweaking as necessary. Sometimes a perfectly laid out cluster on the floor can translate differently once it starts to take shape on your wall.

Our top tips for perfectly hung artwork - EVERY TIME!
TIP ONE
Place the frame onto your wall in the exact height you want it hung, then using a pencil, make a mark on your wall in the centre of the very top of your frame.
TIP TWO
Bring your print back to the ground, spin it around, and measure the distance between the hanging string (at tension) and the very top of your frame using a tape measure.
TIP THREE
Keep the extended tape measure to bring back to the wall and using the pencil mark you made in step one, measure from this point down using the measurement taken in step two and mark with an x.. This is the exact position for your hook/ to screw into the wall.
TIP FOUR
Drill away and hang your piece to enjoy!


Need some more inspo?
Check out the amazing curated gallery walls our norsuHOME styling team have recently put together across a variety of colour palettes, themes and interests. We know you'll find something that you absolutely love!
Want a helping hand?
If you have an idea of what you like but you're not too sure where to start, our Style Your Wall Like a Pro eService is for you! Simply select your package, send us pics, answer our simple questions, and wait for our styling gurus to send you a visual representation of your perfectly styled wall.
Meet our clever stylists
You've had a sneak peek of what goodness our stylists can create, but we promise you that this doesn't even scrape the surface! Our clever in-house interior design and styling team can work with you to design a space that reflects your personal style as well as covering all your needs.
Contact our team to start your journey...
